|
|
|
|
|
|
| NotesBasic StructureJointsDado Jig
Section 1My Teaching Notes.
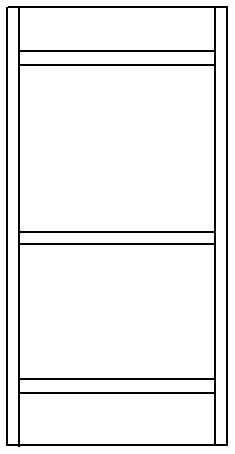
Notes for Bookcase Class #2 ¾" Step 2. Basic structure - See the diagram below. a) Secret #1 – make sides 6" above and 6" below top and bottom. Illustration. b) Operations which need to be done before you assemble the case.
c) Key to finishing success – Leave the back off until after the finish is applied. That is why you need to use the Head Brace and Foot Brace pieces. Adds tremendous rigidity to the case. Step 3. Why is it so important for the case to be square?The face frame won’t fit correctly. The crown/cove molding miters won’t fit correctly. The back won’t fit correctly. The base miters won’t fit correctly. Etc., etc. etc. Step 4. Joints to use WHERE WHEN WHY Step 5. Live Demonstration: Dado Jig for Router Step 6. Assembling the case a) Parallelogram – Mock-up
b) Keeping it square
Types of shelving materials. Spans. Edge banding considerations. Adjustable shelf peg holes and jig. Demonstration: Peg Hole Router Jig
Basic Structure |
|
|
Butt Joint | The most used joint in all of woodworking is very often the best joint to use in making your bookcase. For the top and bottom, the screw holes will be completely hidden behind the base wrap and crown molding. |
|
|
||
|
|
Plugs or Bungs | When the screw holes will be exposed (such as for a fixed intermediates shelf), simple plugs or bungs are almost invisible. Take greater care than I did here to match the grain direction and size. |
|
|
Cleats | When a butt joint is reinforced with a simple 3/4" square cleat, it becomes very strong. It is fast, simple, easy and strong. |
|
|
You can quickly mass produce many feet of cleat material on the drill press by drilling countersunk holes on two adjacent sides. | |
|
|
Not to worry about hiding the cleat. It will be covered by the crown molding or the base wrap. In the case of an intermediate shelf, edge banding 1-1/2" will cover it completely. | |
|
|
Dado Joint | A dado 1/4" deep offers superior support for tops, bottoms and intermediate shelves. Simply glue in the shelf and toe nail down from the top and up from the bottom to lock it in. |
|
|
Very acceptable for an exposed intermediate shelf, for frameless construction or where edge banding is not used. | |
|
|
One of the Keys to Success | Allow and extra 4-6" above and below for Head and Foot Braces. |
|
|
This brace will be covered by the Crown/Cove molding detail or by the base wrap. The brace can be 2" to 6" or more. It adds tremendous rigidity and strength to your bookcase. | |
|
|
This is how it appears as a Foot Brace | |
|
|
Here it is seen as a Head Brace. You may attach it to the top shelf, but you don't have to. | |
|
|
This is what it would look like from the back. | |
|
Counter Sinks | These counter sinks and pilot holes in one are fast, accurate and easy to use. Make sure the pilot hole is large enough to clear the screw threads and avoid "screw jacking" |
|
This quick change device contains a pilot drill and countersink in one end and a driver bit holder in the other. It can be quickly turned around and is a real time saver. | |
|
3D Squaring Jigs | Use these to assist you with assembly. They will help you attach tops to sides at precisly 90 degrees. Alignment is much easier when using clamps and squaring jigs. |
|
You need 4 clamps for most casework projects. |
![]()

Definition: An adjustable guide used with a router and a hinge mortising or flush trim bit to cut a dado exactly the size of tenon material. Simply two straight edges (one adjustable in relation to the other) used to guide a top bearing flush trim bit which enables you to cut a dado the prefect width every time.
Use the actual material to set the width of the jig -- No measuring! No offsets, No allowances of any kind.
Important: You will be attaching the two main pieces of the jig at exact right angles to each other. Take extra time and great care to be very certain that they are at 90 degrees, exactly. Nail, glue, screw and clamp the pieces to make sure they do not move while the glue dries.
|
|
Router Dado Jig - Front Side | Simply clamp the jig to the piece in which you wish to cut the dado, set the adjustable piece and cut a perfect dado. |
 |
Main Assembly Glued at Exactly 90 Degrees | The heart of the jig is a carefully constructed right angle. |
|
|
Router Dado Jig - Back Side | You can see the wing nuts which allow the second arm to be adjustable. |
|
|
Four Pieces with right angle already glued | These are all of the parts. |
|
Mortising Flush Trim Bit | This bit uses a top mounted bearing to follow the jig sides a guide. I recommend either a 1/2" diameter by 1/4" deep or 5/8" diameter by 1/2" deep hinge mortising bit. The depth of the dado is determined by the amount the bit sticks below the jig. |
|
|
Setting the width is easy | To set the jig, place some shelf material in the jig, snug up the other side, tighten down, remove the piece and rout the dado. |
|
|
Two Ranges | This design will accommodate shelves up to 12" in the first hole and up to 16" using the second hole. |
|
|
Jig is C-Clamped to Side Piece | Use a simple C-Clamp to attach the jig to the side piece. |
|
|
Parallel Piece is Adjustable up to 2" | The thickness range of the jig will accommodate shelves from 1/2" to over 2" thick. It is normal for the bit to cut into the cross piece. Just be careful not to cut all the way through. |